Deploy And Set Desktop Wallpaper, Lock Screen Images, Outlook Signature & Screensaver Using Microsoft End Point Configuration Manager (SCCM).
This article will discuss how to design, create, deploy, and set Windows personalization items like Outlook email signatures, desktop wallpapers, lock screen images, and video screensavers using Microsoft End Point Configuration Manager (SCCM). It will be an end-to-end guide for setting up the personalization of the above items. This article is written just for you if you run an organization with over 10000 employees and a mix of networked and cloud-managed devices. I hope you find this article informative.
For the sake of this article, I am an IT manager for a large organization with over 10,000 users worldwide. My team and I have been upgrading end-user computing devices from Windows 7, 8.1, and Windows 10 to Windows 11 in the last few years. Now, my organization is in another folk on the road, where we must move login script-based automation to SCCM, paving the way for easy onboarding to Microsoft Intune in a few years.
Previously, we used a combination of AD group policies and login scripts to set desktop backgrounds, Outlook signatures, lock screen images, and screensavers. We are looking for a solution to deploy the following Windows personalization items to all our users worldwide using Microsoft Intune.
WPSecure Personalization Packager satisfied all our requirements because it could create packages containing the items below and deploy them as standard applications using Microsoft Intune and SCCM. WPSecure Personalization Packages can be deployed to networked and cloud-connected devices, helping transition seamlessly. Download the Packager by clicking on the link in the top-right corner of this page.
- Outlook email signatures for new and reply messages.
- Desktop backgrounds for landscape and portrait screens.
- Video screensavers for landscape and portrait screens.
- Lockscreen images for landscape and portrait screens.
Lets talk tool, price and affordability
We found the WPSecure Personalization Packager very affordable, with the price set at 1 USD/YEAR/device compared to other providers who charge 1 – 2 USD/MONTH/User just for a single feature. We liked not having to set up new infrastructure servers, web apps, or databases. The silent installers created by the Packager are self-contained and intelligent, and they clean up after themselves after being removed from a device. The Packager allows us to distribute desktop wallpapers, Outlook signatures, lockscreen images, and video screensavers as one package; we love the 4 tools in 1 approach. Finally, we can use our existing software deployment tools like Microsoft Intune and SCCM to deploy the silent installers created by the Packager without investing in new technologies.
Lets design, create, package, and deploy
Click on this link to learn about the prerequisites and information on preparing your environment.
With a well-articulated statement of work, my team and I embarked on a journey to storyboard, design, create, package, and deploy the above personalization items. Below are the steps we took to accomplish that task.
- Design and create desktop background images.
- Design and create Outlook email signatures.
- Design and create video screensavers.
- Design and create lockscreen images.
- Create a silent installation package.
- Deploy the package using Microsoft Endpoint Configuration Manager (SCCM).
1. Design and create desktop background images.
Our internal communications team requested simplicity, coherence, clarity, and quality. With that mandate, my team started designing the images following the guidelines below.
- Identify all possible screen resolutions on each monitor/screen within the network infrastructure, including work-from-home scenarios.
- Identify all possible screen orientations (landscape and portrait) for each monitor/screen within the network infrastructure, including work-from-home and remote scenarios.
- Desktop backgrounds/wallpapers should support the following resolutions: 1080P (Full HD): 1920×1080 pixels1, 2 K (Quad HD): 2560×1440 pixels, 4 K (Ultra HD): 3840×2160 pixels, 5 K: typically around 5120×2880 pixels1, and 8 K: 7680×4320 pixels.
- Each image’s file size must not exceed 10 MB, and the image PPI (Pixels Per Inch) should be set at 72 PPI.
- Design and create a landscape prototype for a desktop wallpaper image.
- Design and create a portrait prototype for the desktop background image.
- On approval, create images for other screen resolutions and orientations.
After a few days of design work, my team finalized the following designs. The design for portrait and landscape screens is in the image below. The design included a list of words in a Word Cloud that characterize a Great Team. The Word Cloud was positioned differently to suit landscape and portrait screens.

Based on positive feedback from the internal communication department, my team created images in the following sizes for other screen resolutions and orientations.
An end-user computing engineer told me that just an image in a 16:9 aspect ratio would suffice for most displays, but our mandate was that the designed images not be stretched or pixelated. So, we designed and created desktop wallpaper images from the following screen resolutions. The list includes landscape and portrait images.
| Width | Height | Orientation |
|---|---|---|
| 7680 | 4320 | Landscape |
| 5120 | 2880 | Landscape |
| 4500 | 3000 | Landscape |
| 4320 | 7680 | Portrait |
| 4096 | 2160 | Landscape |
| 3840 | 2160 | Landscape |
| 3440 | 1440 | Landscape |
| 3240 | 2160 | Landscape |
| 3000 | 2000 | Landscape |
| 3000 | 4500 | Portrait |
| 2880 | 5120 | Portrait |
| 2880 | 1920 | Landscape |
| 2736 | 1824 | Landscape |
| 2560 | 1600 | Landscape |
| 2560 | 1080 | Landscape |
| 2560 | 1440 | Landscape |
| 2496 | 1664 | Landscape |
| 2256 | 1504 | Landscape |
| 2160 | 4096 | Portrait |
| 2160 | 1440 | Landscape |
| 2160 | 3840 | Portrait |
| 2160 | 3240 | Portrait |
| 2048 | 1536 | Landscape |
| 2048 | 1080 | Landscape |
| 2048 | 1152 | Landscape |
| 2000 | 3000 | Portrait |
| 1920 | 1440 | Landscape |
| 1920 | 2880 | Portrait |
| 1920 | 1280 | Landscape |
| 1920 | 1080 | Landscape |
| 1920 | 1200 | Landscape |
| 1824 | 2736 | Portrait |
| 1800 | 1200 | Landscape |
| 1680 | 1050 | Landscape |
| 1664 | 2496 | Portrait |
| 1600 | 2560 | Portrait |
| 1600 | 900 | Landscape |
| 1600 | 1024 | Landscape |
| 1600 | 1200 | Landscape |
| 1536 | 2048 | Portrait |
| 1536 | 864 | Landscape |
| 1504 | 2256 | Portrait |
| 1440 | 1920 | Portrait |
| 1440 | 900 | Landscape |
| 1440 | 2160 | Portrait |
| 1440 | 960 | Landscape |
| 1440 | 3440 | Portrait |
| 1440 | 2560 | Portrait |
| 1400 | 1050 | Landscape |
| 1366 | 768 | Landscape |
| 1360 | 768 | Landscape |
| 1280 | 720 | Landscape |
| 1280 | 800 | Landscape |
| 1280 | 1024 | Portrait |
| 1280 | 768 | Landscape |
| 1280 | 960 | Portrait |
| 1280 | 600 | Landscape |
| 1280 | 1920 | Portrait |
| 1200 | 1800 | Portrait |
| 1200 | 1600 | Portrait |
| 1200 | 1920 | Portrait |
| 1152 | 2048 | Portrait |
| 1152 | 864 | Landscape |
| 1080 | 2048 | Portrait |
| 1080 | 1920 | Portrait |
| 1080 | 2560 | Portrait |
| 1050 | 1400 | Portrait |
| 1050 | 1680 | Portrait |
| 1024 | 768 | Landscape |
| 1024 | 1280 | Portrait |
| 1024 | 1600 | Portrait |
| 960 | 540 | Landscape |
| 960 | 1280 | Portrait |
| 960 | 1440 | Portrait |
| 900 | 900 | Landscape |
| 900 | 1440 | Portrait |
| 900 | 1600 | Portrait |
| 864 | 1152 | Portrait |
| 864 | 1536 | Portrait |
| 800 | 600 | Landscape |
| 800 | 1280 | Portrait |
| 768 | 1024 | Portrait |
| 768 | 1280 | Portrait |
| 768 | 1366 | Portrait |
| 768 | 1360 | Portrait |
| 720 | 1280 | Portrait |
| 600 | 1280 | Portrait |
| 600 | 800 | Portrait |
| 540 | 960 | Portrait |
| 500 | 500 | Landscape |
We used Adobe Illustrator to extrapolate the details of the master image and create other image sizes. After creating the other images, the source folder looked similar to the picture below.


The images in this folder are ready to be imported into the WPSecure Personalization Packager. But before we do that, we’ll have to create templates for Outlook email signatures for ‘new‘ and ‘reply‘ messages, video screensavers, and lockscreen images for landscape and portrait screens.
2. Design and create Outlook email signatures.
We used Microsoft Office Word to create Outlook email signatures in HTM and RTF formats and Notepad to create an Outlook email signature in TXT format.
Within the email templates (HTM, RTF, and TXT), we inserted placeholders that will act as markers into which user attributes like ‘FirstName,’ ‘LastName,’ ‘Email,’ ‘Address,’ etc. will be substituted.
There are three types of Microsoft Outlook signatures:
- New message signature.
- Reply message signature.
- Web message signature.
We’ll use the following guidelines when designing and creating the Outlook email signature templates for the ‘New‘, ‘Reply‘, and ‘Web‘ signatures.
The total file size of each Outlook signature and its assets cannot exceed 10 MB, and we recommend keeping the number of characters for HTM files below 25,000 for New/Reply signatures and 8000 for web signatures.
New message signature: A new message signature is used when composing a new Microsoft Outlook message. It should include a ‘wpsecure_new.htm’ HTML file and optionally include a ‘wpsecure_new.txt’ file, a ‘wpsecure_new.rtf’ file, and an optional ‘wpsecure_new_files’ directory that contains resource files like images, CSS, etc.
Reply message signature: A reply message signature is used when replying to an email message. It should include a ‘wpsecure_reply.htm’ HTML file and optionally include a ‘wpsecure_reply.txt’ file, a ‘wpsecure_reply.rtf’ file, and an optional ‘wpsecure_reply_files’ directory that contains resource files like images, CSS, etc.
Web message signature: (From version 55.1.2.4) A web message signature is used by ‘Outlook On The Web/Outlook New.’ It should include a ‘wpsecure_web.htm’ HTML file and optionally include a ‘wpsecure_web.txt’ file. All image references should use URL (https) sources. Local image references cannot be used.
After we design and create the Outlook email signature templates, the folder containing the template will look similar to the image below.
User attribute placeholders
Before we started creating the email signature templates, we discussed the details of the user attributes and how to set them in the signature templates. When using the WPSecure Personalization packager, the user attributes are set using placeholders. The following table lists all the user attributes that can be retrieved from EntraID (Azure AD) or Active Directory Services.
Active Directory | Azure (Entra) | Description |
|---|---|---|
| ad_telephonenumber | az_businessphones1 | Phone number associated with the user. |
| ad_l | az_city | City where the user is located. |
| ad_company | az_companyname | Name of the user’s company or organization. |
| ad_c | az_country | Country code or name where the user resides. |
| ad_department | az_department | Department or team within the organization. |
| ad_displayname | az_displayname | User’s display name (usually first and last name). |
| ad_employeeid | az_employeeid | Unique identifier for the employee. |
| ad_facsimiletelephonenumber | az_faxnumber | Fax number associated with the user. |
| ad_givenname | az_givenname | User’s first name. |
| ad_title | az_jobtitle | Job title or position within the organization. |
| ad_mail | az_mail | Email address of the user. |
| ad_mailnickname | az_mailnickname | Unique nickname for the user’s email address. |
| ad_mobile | az_mobilephone | Mobile phone number of the user. |
| ad_office | az_officelocation | Physical office location or workspace. |
| ad_postalcode | az_postalcode | Postal code or ZIP code of the user’s address. |
| ad_st | az_state | State or region where the user resides. |
| ad_streetaddress | az_streetaddress | Street address of the user. |
| ad_sn | az_surname | User’s last name or surname. |
| ad_userprincipalname | az_userprincipalname | Principal name used for authentication (usually the email address). |
We created a ‘Text’ file containing all required placeholders. The documentation for WPSecure Personalization Packager recommends not entering the placeholders directly into the tools that make the HTM or RTF files and always copying and pasting them from the ‘TXT’ file into those tools.

[Preview feature in version 55.1.2.4] Using Azure Function App integration, we can automatically set default signatures for “Outlook On The Web/Outlook New“. Click here to learn more.
There are three ways to set the values for the Microsoft Outlook signature placeholders programmatically. All of them require some background work in the Entra ID Portal.
Interactively using a Azure Function App and Microsoft Graph | Get users attributes from Azure and Update "Outlook On The Web / Outlook New" default signature. |
Interactively using a Microsoft Graph | Get user attributes from Azure. Entra ID App registration info - Read part A. |
Organization wide silent sync using Microsoft Graph | Allow Administrators to download placeholder data for Outlook signatures on behalf of the Users using Microsoft Graph. Entra ID App registration info - Read part B. |
The above methods draw down the user attributes and write the attributes to the Current User Registry Hive. The WPSecure Outlook signature processing process replaces the placeholders with the corresponding values at runtime.
We will create Outlook signature templates in the following formats. Outlook signature in HTM format is required, but RTF and TXT formats are optional.
| HTM format |
| RTF format |
| TXT format |
Create a master Outlook signature template document
Multiple ways exist to create an email signature template. However, we chose Microsoft Word, a basic but relatively effective tool for creating an HTM signature.
We designed the email signature content in Microsoft Word and saved the file in HTM and RTF formats.

We replaced the relevant user attributes with placeholders from the placeholder text file.
We followed the following guidelines strictly to avoid placeholder scrambling. RTF files tend to scramble placeholders if an edit is made after inserting them.
- We right-clicked and copied the placeholder from a text file
- We point-clicked on the place where we wanted to paste the content
- We pasted the placeholders to the right spot.
- We ensured we did not edit the placeholders after pasting them.
After inserting the placeholders the Microsoft Office Word document looked similar to the image below.

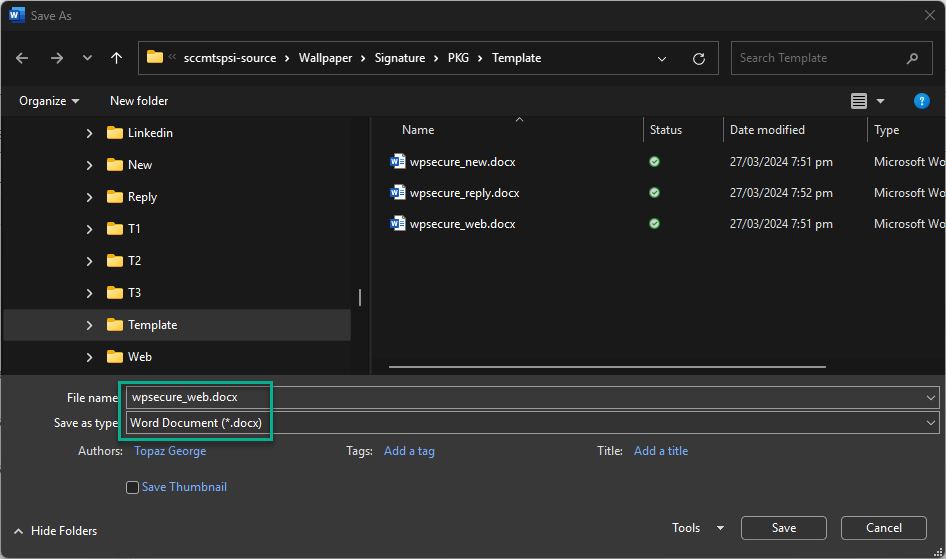
We saved the file as a Word document as three different files.
- wpsecure_new.docx
- wpsecure_reply.docx
- wpsecure_web.docx
‘wpsecure_new.docx‘ will create the ‘New‘ message signature, ‘wpsecure_reply.docx‘ will create the ‘Reply‘ message signature, and ‘wpsecure_web.docx‘ will make the ‘Web‘ message signature.


Outlook signature in HTM format
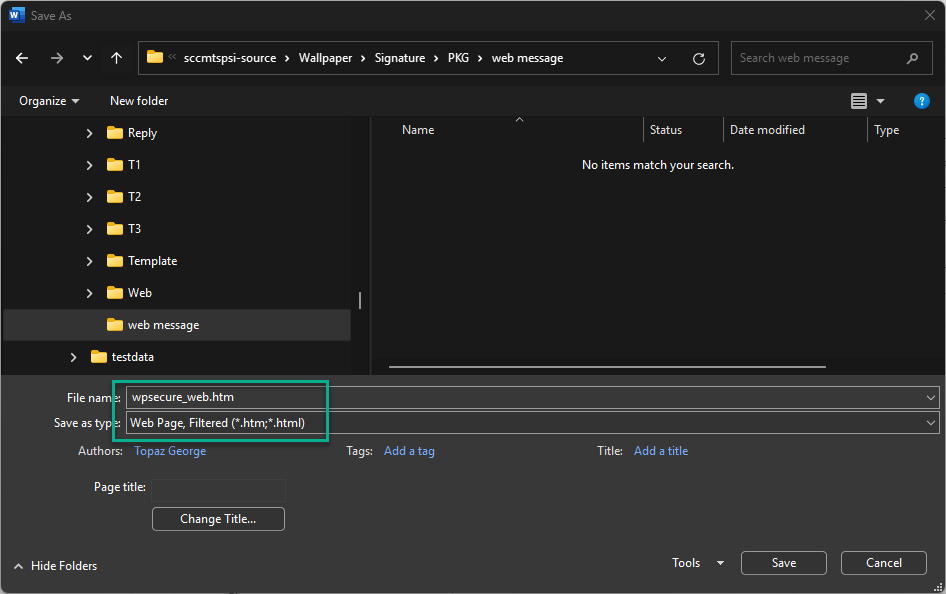
After creating the Outlook email signature templates, the folder looked similar to the image below. We can create the email signature templates in HTM format using the DOCX templates. We opened the DOCX files and saved them as a Web Page Filtered (*.htm, *.html).


Outlook signature in RTF format
We open the DOCX files and save the file in Rich Text Format (*.rtf).


Outlook signature in TXT format
We used Notepad instead of Microsoft Word to create Outlook email signatures in TXT format because we wanted a different layout. We used the same TXT-based email signature template for ‘New‘, ‘Reply‘, and ‘Web‘ messages. We saved the file as ‘wpsecure_new.txt‘, ‘wpsecure_reply.txt‘ and ‘wpsecure_web.txt‘.

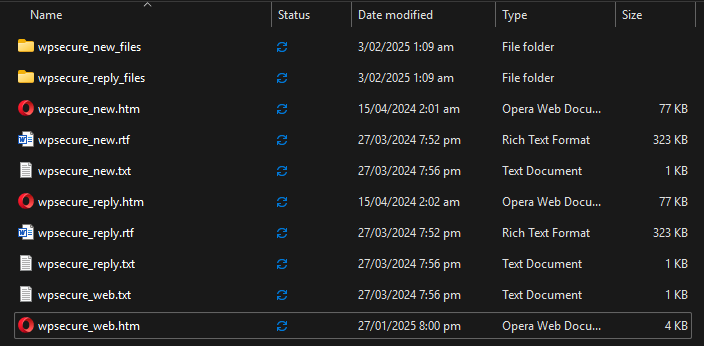
After creating Outlook email signatures in HTM, RTF, and TXT formats, the target folder will look similar to the image below.
We can import ‘New‘, ‘Reply‘, and ‘Web‘ message signatures into the WPSecure Personalization Packager. But before we do that, we’ll have to design and create video screensavers and lockscreen images for landscape and portrait screens.
3. Design and create video screensavers.
We are excited to design, create, and deploy a Video screensaver. Video screensavers provide message clarity and appeal that slideshows and other static screensavers cannot. We wanted to use the screensaver to inspire teamwork within our organization. MP4 Video files will be created with the following scenarios in mind.
- Landscape video will be used if the display screen has a landscape layout.
- A portrait video will be used if the display has a portrait layout.
We will design and create two MP4 videos, one for landscape screens and the other for portrait screens, with a file size of less than 50MB, per the WPSecure Personalization Packager requirements. We downloaded a video from YouTube for this article, edited it, and converted it to an MP4 file using Techsmiths Camtasia. The link to the video is below.
After editing, we had a landscape and a portrait video. The landscape video will run on a screen set with a landscape orientation, and the portrait video will run on a portrait screen. The graphic below shows how the screensaver will operate when deployed to a device with two screens: Landscape and Portrait.
We can import the landscape and portrait-oriented videos into the WPSecure Personalization Packager. But before we do that, we’ll have to design and create lockscreen images for landscape and portrait screens.
4. Design and create lockscreen images.
Lock Screen Images will serve the following purpose within our organization.
- Organizational branding.
- Device use disclaimer.
- Seasonal greetings.
Windows Lock Screen images were traditionally only set in Landscape dimensions, with the Width of the image larger than the Height. The ‘Main monitor’ in Windows 10 and 11 is the only Screen that will display the Lock Screen image.
The WPSecure Personalization Packager enables you to set a portrait image if the main screen is oriented in portrait mode and a landscape image if it is oriented as landscape. My team and I developed a basic design with our logo and a legal disclaimer.
Note: Since the release of WPSecure Packager version 54.1.5.3, you can import multiple lockscreen images for different screen aspect ratios.

We can import the landscape and portrait-oriented lockscreen images into the WPSecure Personalization Packager. We have all the required personalization items, including desktop wallpaper backgrounds, Outlook email signatures, MP4 videos for screensavers, and lock screen images.
Important note
We downloaded and installed the WPSecure Personalization Packager using the link in the top right corner of this webpage. If you are following along, you should do the same.
We checked the prerequisites and verified that no group policies prevent the change of desktop backgrounds, Outlook signatures, screensavers, and lockscreen images. Click here to read the documentation.
5. Create a silent installation package.
We use the WPSecure Personalization Packager to create an installation file containing the video screensavers, outlook signatures, desktop wallpapers, and lock screen images. The tool will also generate an installation file in the ‘.intunewin‘ file format that can be deployed as a Win32 App using Microsoft Intune. Click on the button on the top right corner of the screen to download and install the packager.
After installing the WPSecure Personalization Packager we launched the tool from the start menu.

We agreed to the terms and entered the application.

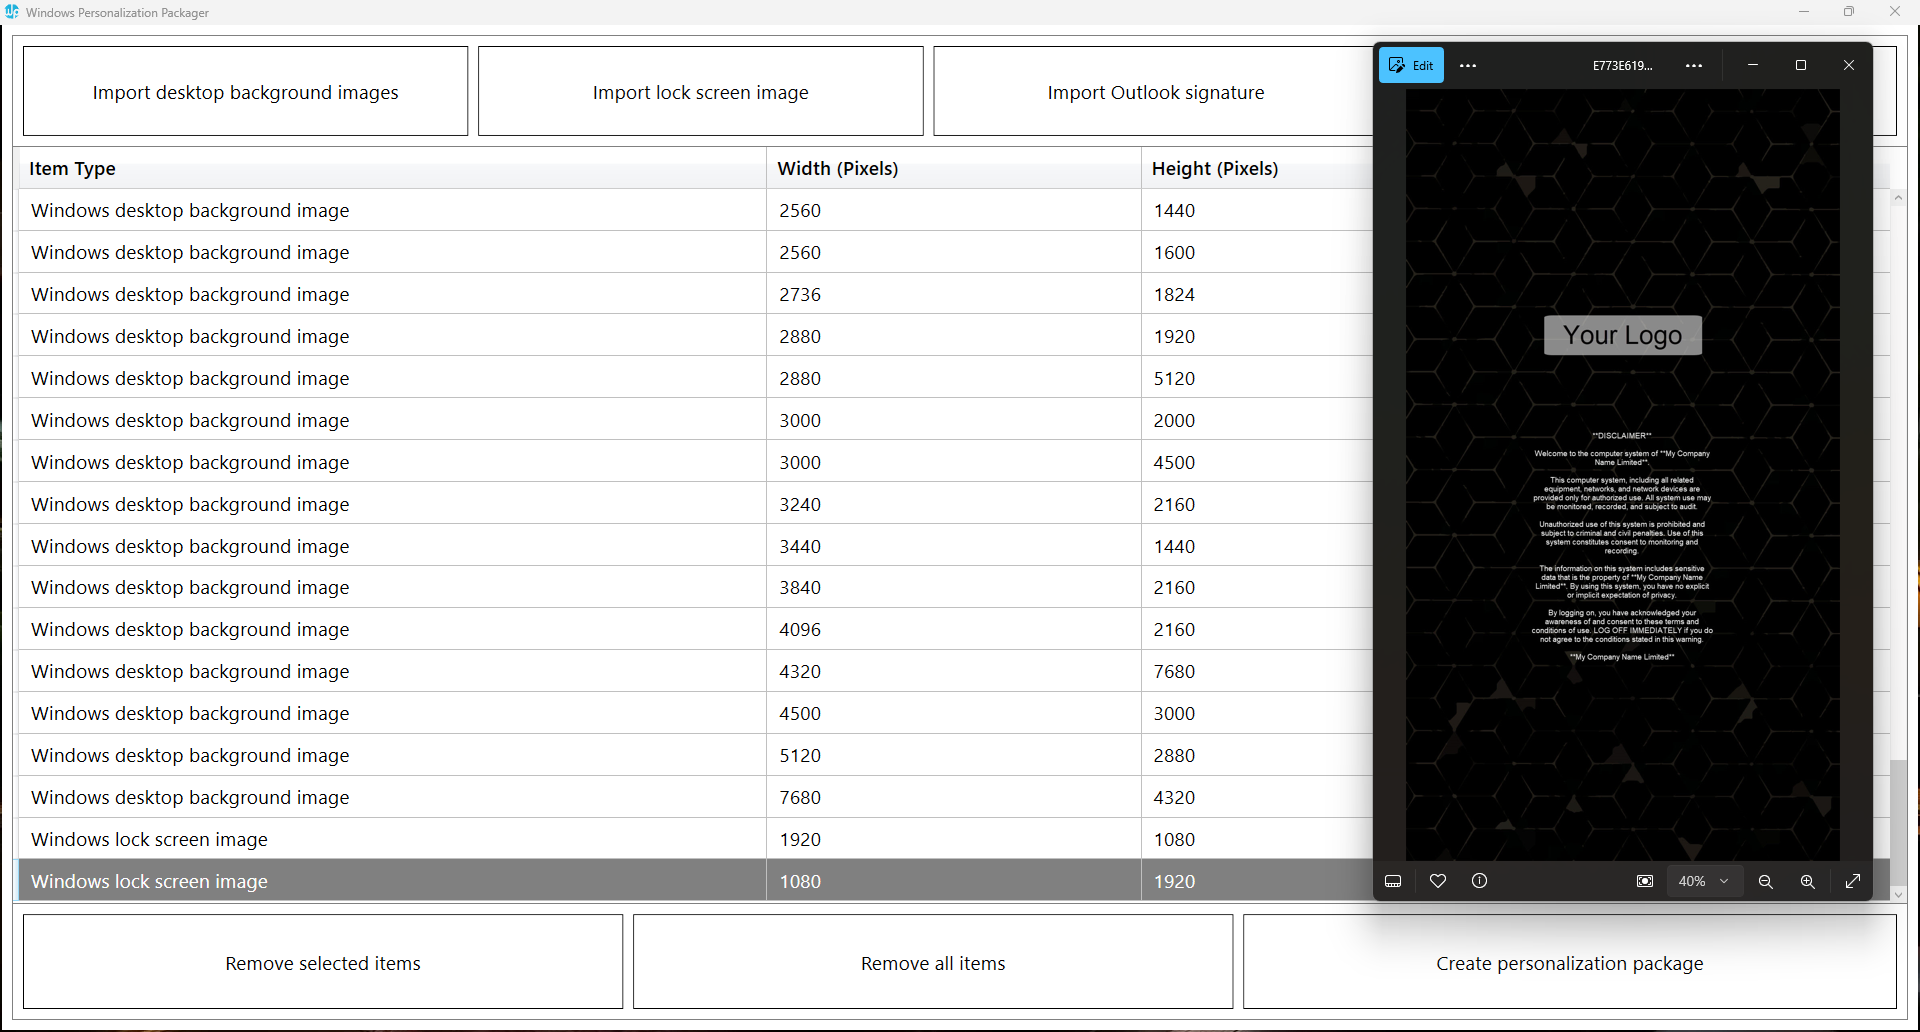
After agreeing to the terms of use, we were redirected to the application’s main page. The buttons at the top of the page were personalization input buttons, and the buttons at the bottom were action buttons.

We clicked the “Import desktop background images” button to import the newly designed desktop background images from the folder that contains the images for the desktop backgrounds.
We selected all the images and clicked on “Open.” The image below shows a preview of a selected image from the Personalization Packager.


We clicked the “Import lock screen image” button to import the newly designed lock screen images one at a time from the folder containing the photos for lock screens. In our case, we only imported 2 images—one for landscape (1920X1080) and another for portrait (1080X1920).

We clicked the “Import Outlook signature” button to import the newly designed email signatures, both New and Reply message signatures, one at a time from the folder containing the email signatures. Click on the imported item to preview it.


We clicked on each imported Outlook signature template to ensure we imported the correct signature for ‘New‘ and ‘Reply‘ messages.

We clicked the “Import screensaver” button to import the newly designed MP4 videos (landscape and portrait) one at a time from the folder containing the video files.


After importing all the personalization items like desktop wallpaper images, video screensavers, Outlook email signatures, and lockscreen images, we clicked on the “Create personalization package” button to start the package creation process (this process creates the silent installer package).

Below are some brief notes on the personalization package.
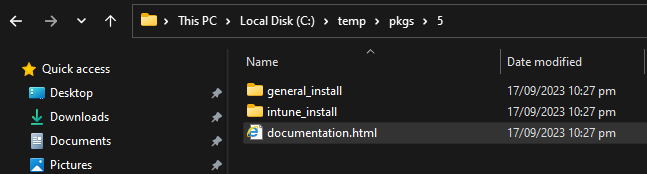
A personalization package is a collection of all the settings and files you have imported or created for your desktop backgrounds, Outlook email signatures, lock screen images, and video screensavers. The selected destination folder has to be empty. The personalization package creation process creates two folders: general_install and intune_install.
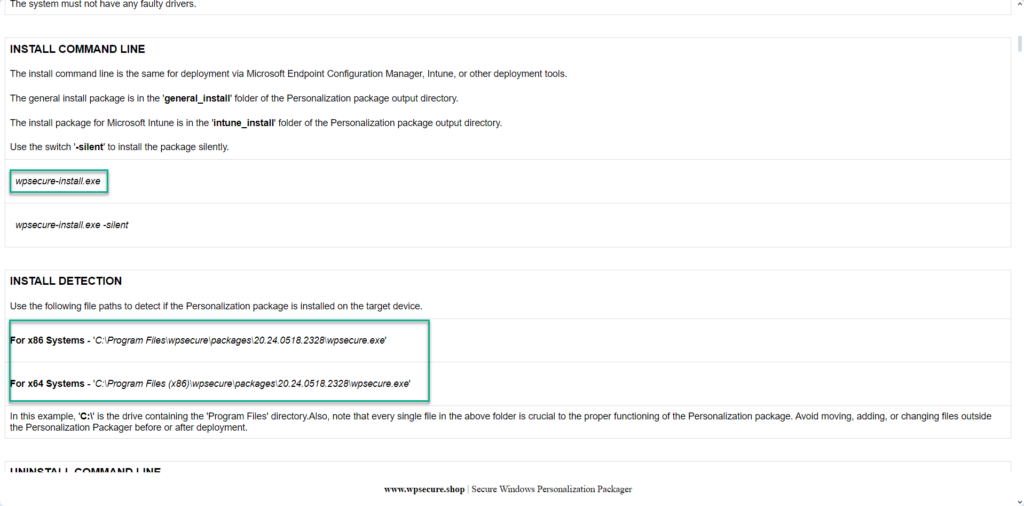
The general_install folder contains installation files for deployment via enterprise software management tools like Microsoft Endpoint Configuration Manager (SCCM). Run the ‘wpsecure-install.exe’ to install the personalization package. More details regarding the enterprise installation and uninstallation process are in the ‘documentation.html’ file.
The intune_install folder contains the ‘wpsecure-install.intunewin’ file to be uploaded to the Microsoft Endpoint Device Management portal (Intune). The command line for this is identical to the general install.
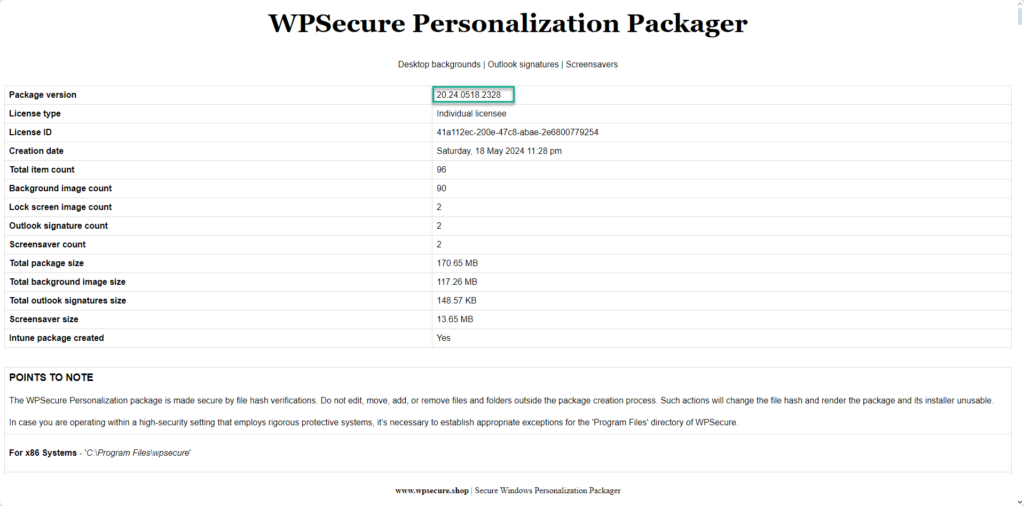
The process also creates a ‘documentation.html’ file that provides all the information required to deploy the personalization package, such as the package version, install and uninstall command lines, and detection methods.

6. Deploy the package using Microsoft Endpoint Configuration Manager (SCCM).
We will deploy the newly created personalization package using Microsoft Endpoint Configuration Manager (SCCM). The source files are located inside the “general_install” folder.

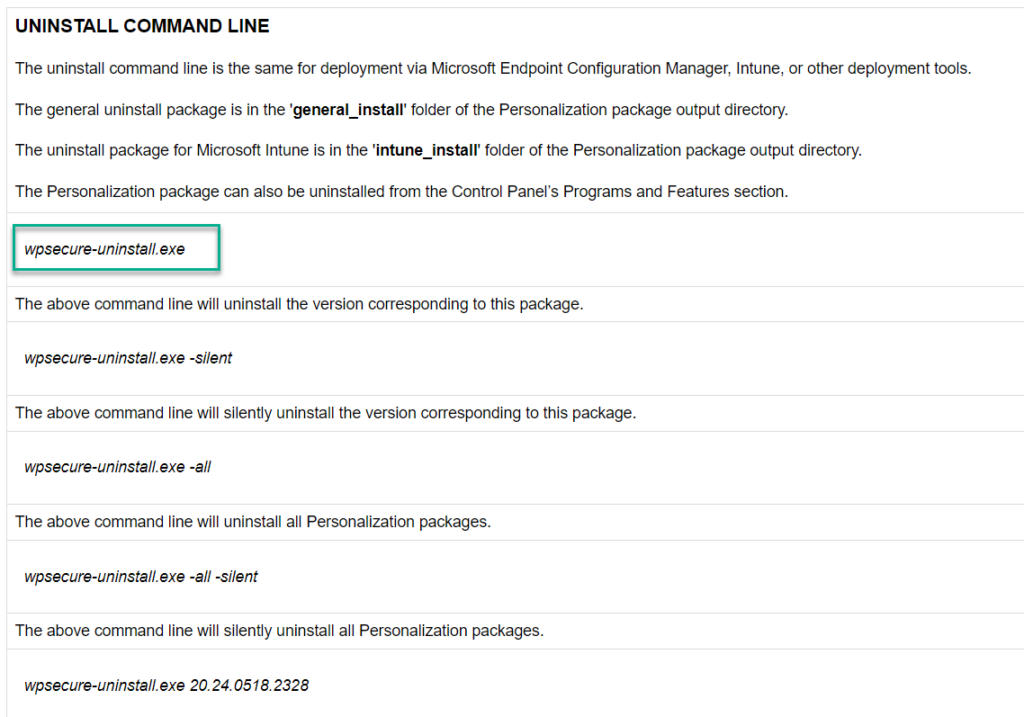
The ‘documentation.html’ file provides all the information required to deploy the personalization package, like package version, install command line, uninstall command line, and detection methods.
Open the SCCM console and start a new Application creation process. Fill out the required information in the SCCM Application using the above information.


Create a new deployment type. Clicking the ‘Add’ button will open a new Window.


Click Next to close the ‘deployment type’ Window.


We clicked Next and completed the process. We distributed the Windows Personalization package to the required distribution points.