Creating Outlook email signature templates | HTM, RTF, TXT
Outlook signature templates can be created in the following formats: HTM format is required, but RTF and TXT formats are optional.
HTM format (Outlook Classic, Outlook On The Web and Outlook New) |
RTF format (Outlook Classic only) |
TXT format (Outlook Classic, Outlook On The Web and Outlook New) |
Most tasks in WPSecure are easy to complete, but creating email signature templates requires more time and attention to detail. So, slow and steady wins the race.
HTML template
If you’re a web developer, you can write your own HTML code and save it as an .htm file. But if you’re not a developer—like most of us—you’ll likely use Microsoft Word to create an .htm file instead. While Microsoft Word isn’t the ideal tool for generating .htm files, it is often the most accessible option available within the standard set of tools used by most people and organizations.
RTF template
RTF stands for Rich Text Format. Many people today are unfamiliar with this file type because it is a legacy format used by older word‑processing applications. However, if your email composition format is set to Rich Text Format instead of HTML (the most common setting) or Plain Text (TXT), this template will still provide a functional email signature.
Microsoft Word is also the best tool for creating RTF-based templates, as it can easily save files in the .rtf format.
Working with legacy technology isn’t always easy—things can break or behave unpredictably. Our goal is that this documentation, along with the automation provided on this page, helps reduce the issues that may occur when working with RTF files.
TXT template
This template is simply a plain text file that can be created using Microsoft Word or directly in Notepad. Most people choose to create the initial version in Microsoft Word for convenience, then make final adjustments to the .txt file using Notepad to ensure it remains clean, unformatted text.
We start by creating Outlook email signature templates for each of the email message types:
- New message signature
- Reply message signature
- Web message signature
New message signature template
A new message signature is applied when composing a message in the Outlook Classic client. This signature must include the wpsecure_new.htm file, while the wpsecure_new.txt and wpsecure_new.rtf files may be included optionally.
Microsoft Word is a highly effective tool for creating Outlook signatures in HTM format because it embeds images using VML, ensuring they display correctly across Outlook clients. When the HTM file is created using Microsoft Word, any images referenced within it are automatically saved in a folder named wpsecure_new_files. If this folder is present, it is automatically included as part of the signature package.
Reply message signature template
A reply message signature is applied when responding to a message in the Outlook Classic client. This signature must include the wpsecure_reply.htm file, with the wpsecure_reply.txt and wpsecure_reply.rtf files included optionally.
Just like the new message signature, Microsoft Word is an effective tool for creating reply signature HTM files. It embeds images using VML, ensuring compatibility across Outlook clients. When the HTM file is created in Microsoft Word, any referenced images are automatically stored in a folder named wpsecure_reply_files. If this folder is present, it is included as part of the signature package.
Web message signature template
A web message signature is used by Outlook on the Web and Outlook New. This signature must include the wpsecure_web.htm file and may optionally include the wpsecure_web.txt file.
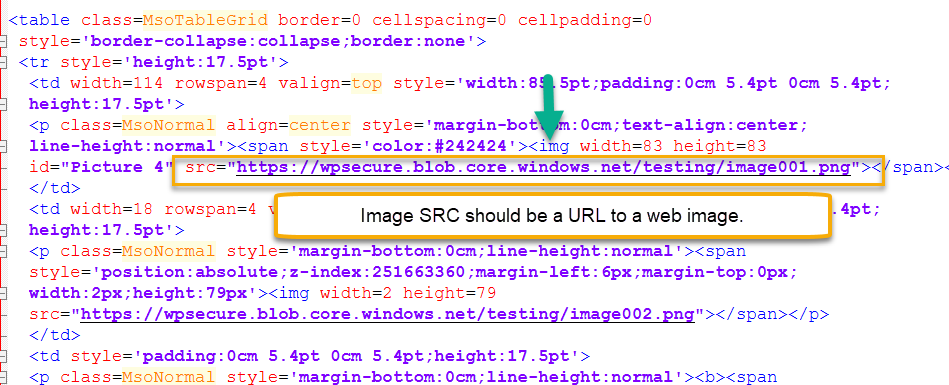
All images referenced in the web signature must use HTTPS-based URLs. Local image files are not supported and will not display in Outlook on the Web or Outlook New.
In both Outlook on the Web and Outlook New, this signature is applied when composing a new message as well as when composing a reply.
Create the reference file
Start by creating a --- A delimited text file that contains a list of placeholder values and an easy‑to‑identify-and-replace identifier for each one. These placeholders will be used within your email templates. The image below illustrates the structure we are aiming to achieve.
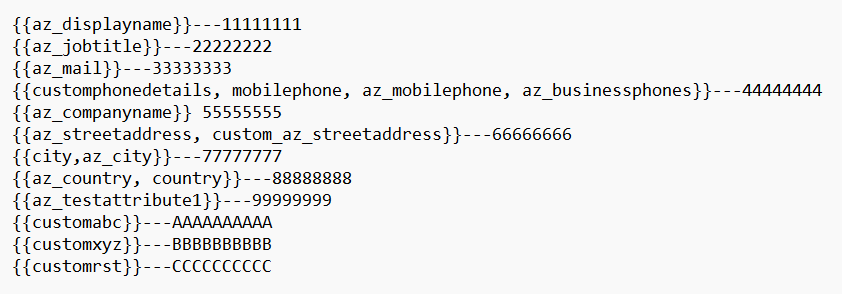
The images above show the placeholder values on the left and identifiers such as 1111111111 and 2222222222 on the right. The reason for this approach is simple: identifiers like these are extremely easy to search for and replace because they are unique, contain no special characters, and are unlikely to appear accidentally in normal text. This makes them ideal for automated or bulk‑replacement operations. Save this file as a text file called “automation.txt“
Make sure to write down the full path to this text file, as you will need it during the assembly and automation steps later in the process.
Create Microsoft Word templates
Next, create three Microsoft Word templates and save them using the following filenames:
- wpsecure_new.docx – for the New message signature
- wpsecure_reply.docx – for the Reply message signature
- wpsecure_web.docx – for the Web message signature
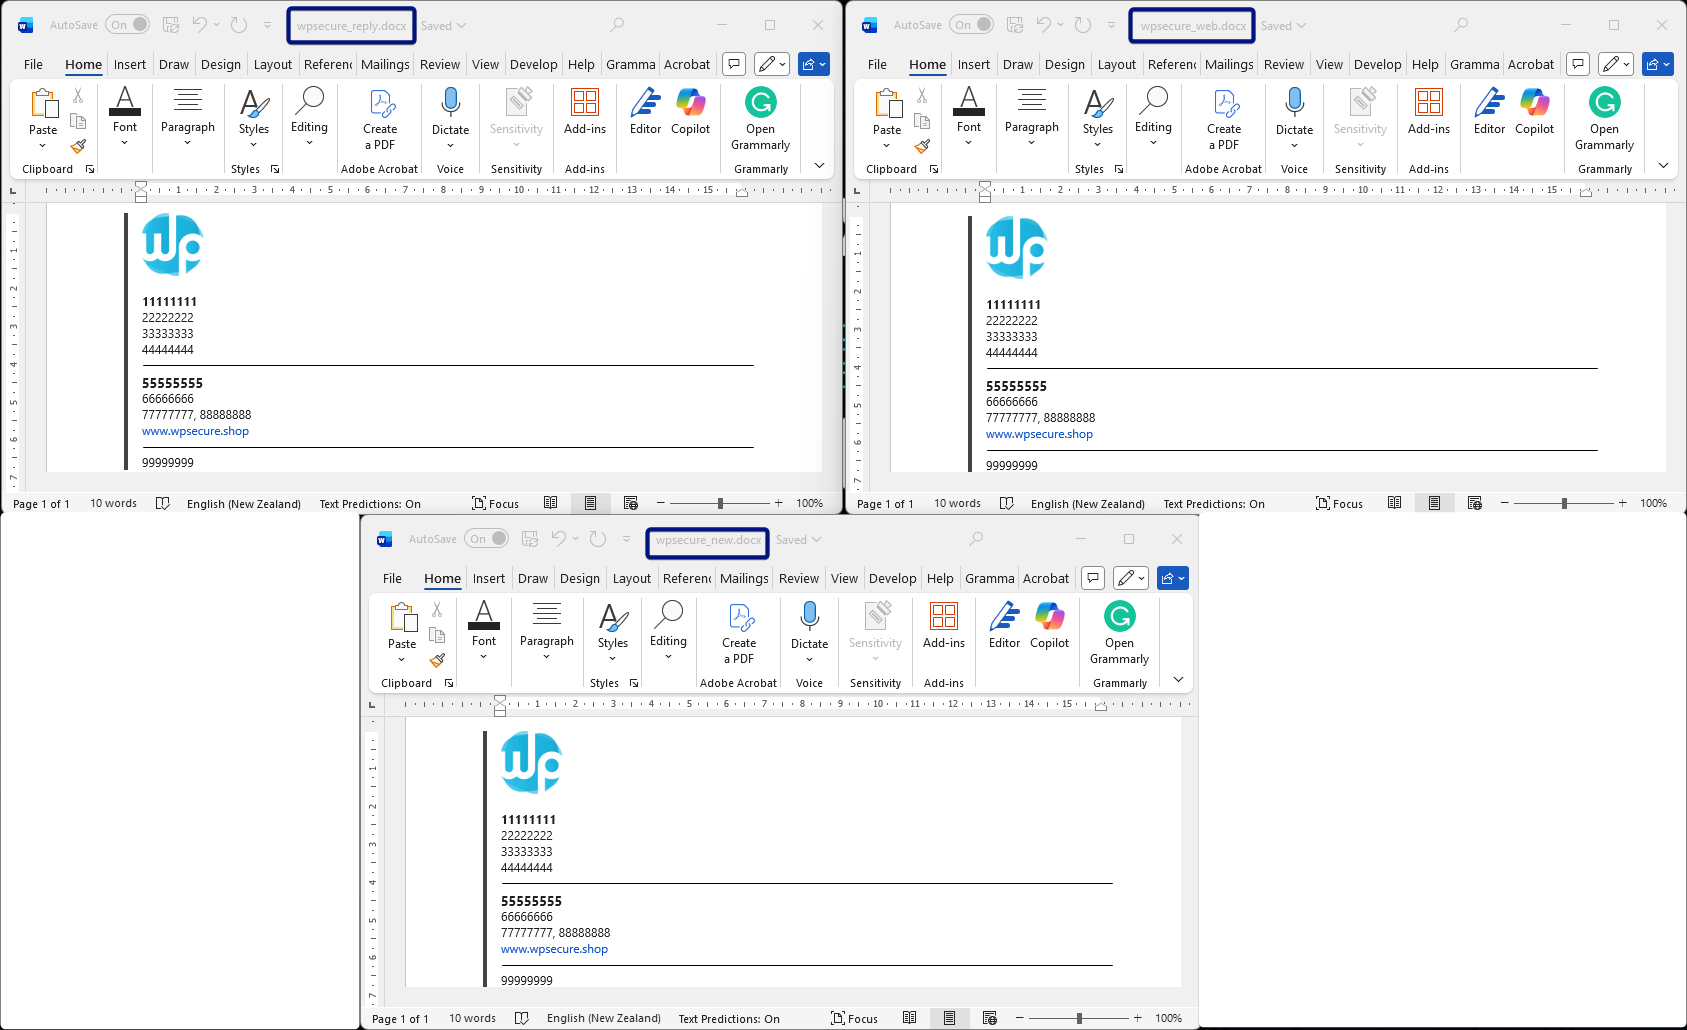
For this demonstration, we are using the same template for all use cases. However, your organization may choose to use different templates for New, Reply, and Web message scenarios.
Listed below are several guidelines that will help ensure the rest of the creation process goes smoothly. We recommend following these guidelines for the best results.
Always insert images from your local computer into the Word document when creating New and Reply message signatures. This ensures Microsoft Word embeds the images using VML (Vector Markup Language), which is required for proper rendering in Outlook Classic.
Use the same approach for Web message signatures, inserting images locally during template creation.
After the HTM file is generated, open the HTM file and replace the local image paths with HTTPS‑based URLs that point to online image resources. Outlook on the Web and Outlook New do not support local image references.For separator lines, always use image files, not Microsoft Word’s built‑in shapes, dividers, or drawing tools.
Insert the separator line as an image for all signature types.
After the HTM file is created:- New and Reply signatures keep the embedded local image.
- Web signatures require replacing the local image reference with an online HTTPS image URL (as described above).
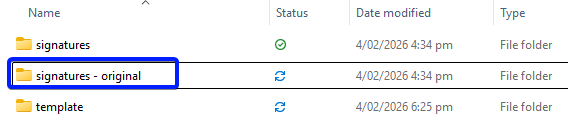
Create a directory to host your original signature files
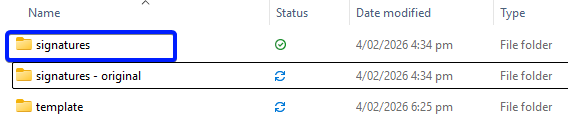
Next, create a new folder named “Signature – Original” in a different location from where your Word DOCX templates are stored. This folder will hold the original versions of your processed signature files.
After creating the folder, open each of the Word document templates you prepared earlier.
- wpsecure_new.docx – for the New message signature
- wpsecure_reply.docx – for the Reply message signature
- wpsecure_web.docx – for the Web message signature
Create HTM templates
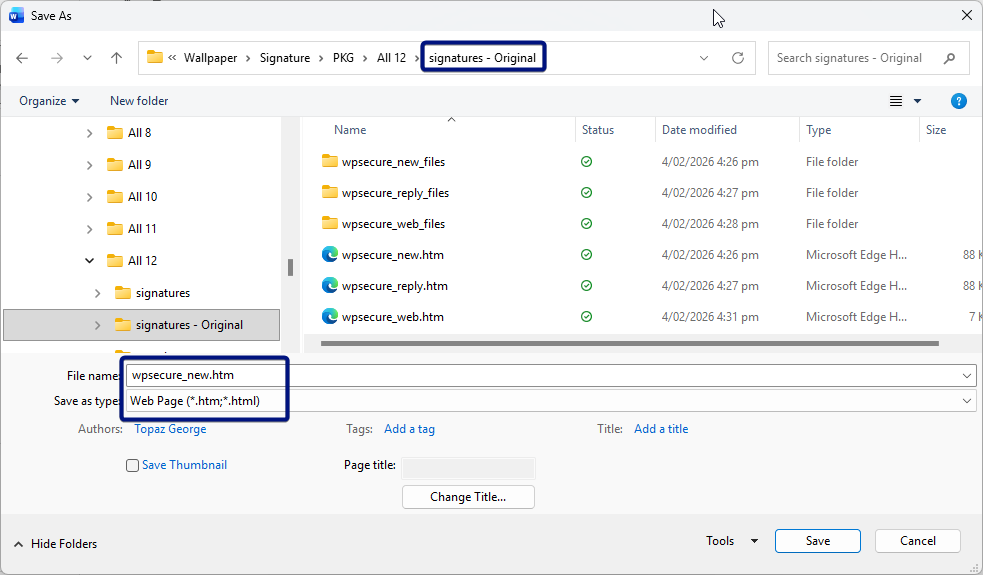
Now save each of the above templates as an HTM file. Open wpsecure_new.docx and save as “Web Page (*.htm; *.html)“
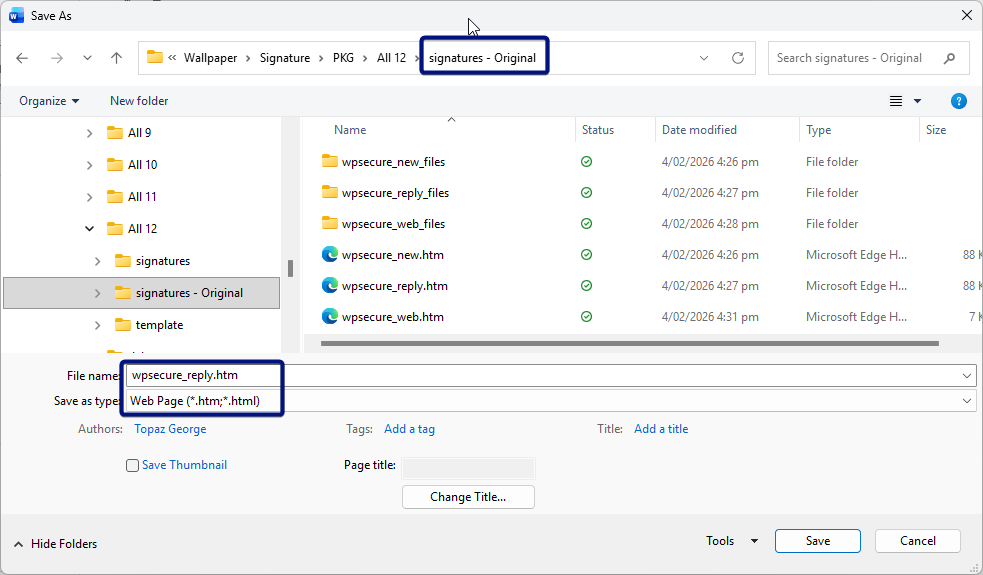
Open wpsecure_reply.docx and save as “Web Page (*.htm; *.html)“
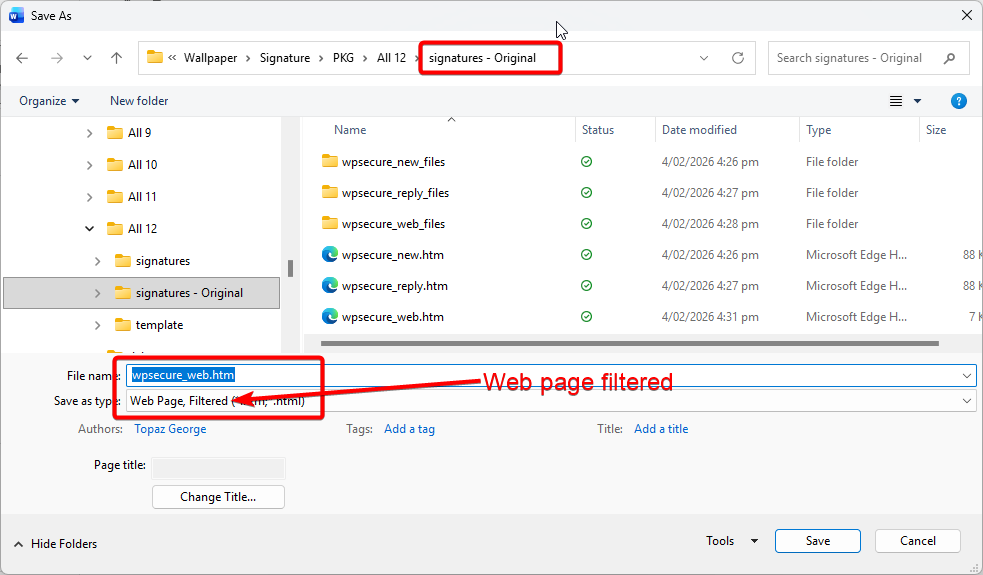
Open wpsecure_web.docx and save as “Web Page, Filtered (*.htm; *.html)“.
Now you can open the HTM files and verify if the images and formatting are as expected. But do not make any changes to the structure or the easy‑to‑identify-and-replace identifiers.
Create RTF templates
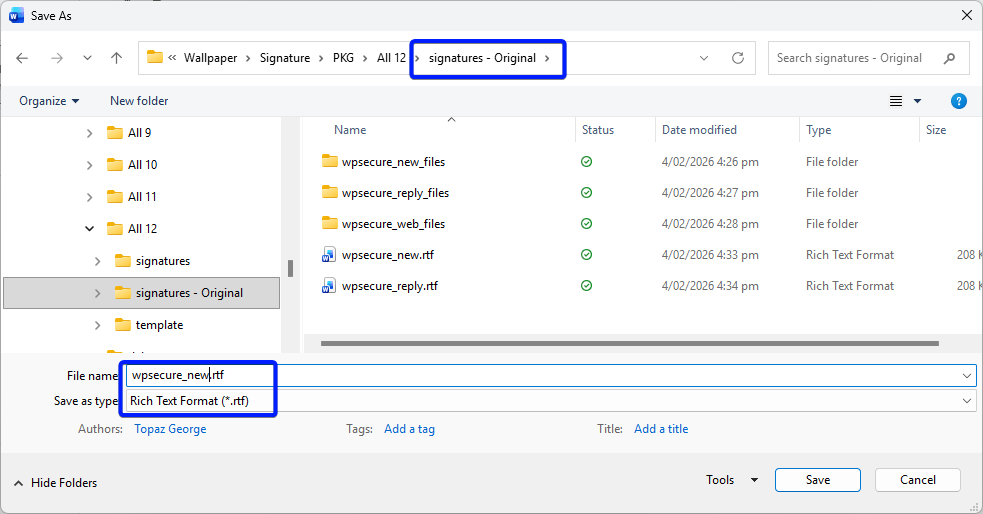
It’s time to create the Rich Text Format (RTF) versions of your templates. Open each of your Word document templates and save a copy as a .rtf file. These RTF files will be used by Outlook Classic for users whose email composition format is set to Rich Text Format instead of HTML or plain text.
The Web message template does not require an RTF template.
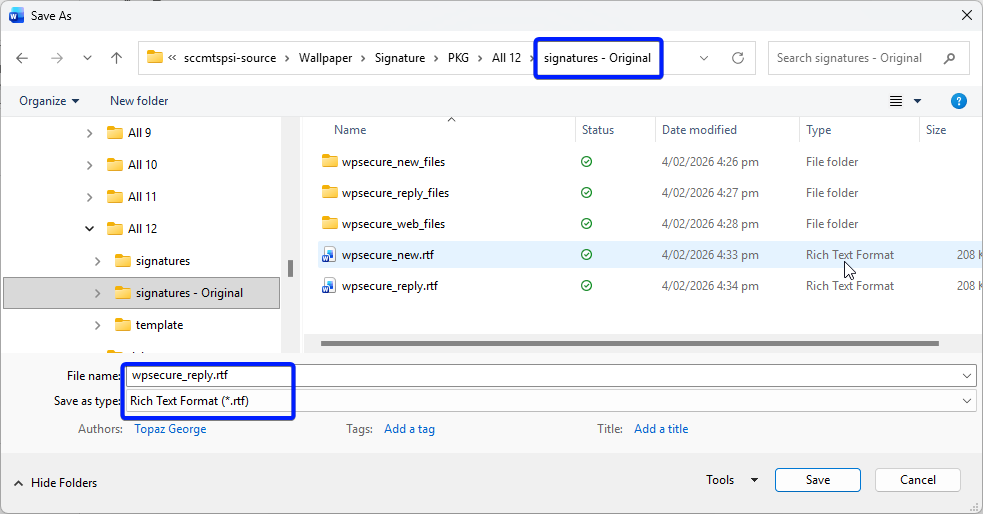
Caution: this can break the RTF. Open the RTF files and verify the image size and proportion. But do not make any changes to the structure or the easy‑to‑identify-and-replace identifiers.
Create TXT templates
It’s time to create the Text File (.txt) versions of your templates. Open each of your Word document templates and save a copy as a .txt file. These TXT files will be used—if available—by both Outlook Classic and Outlook on the Web / Outlook New when a plain‑text version of the signature is required.
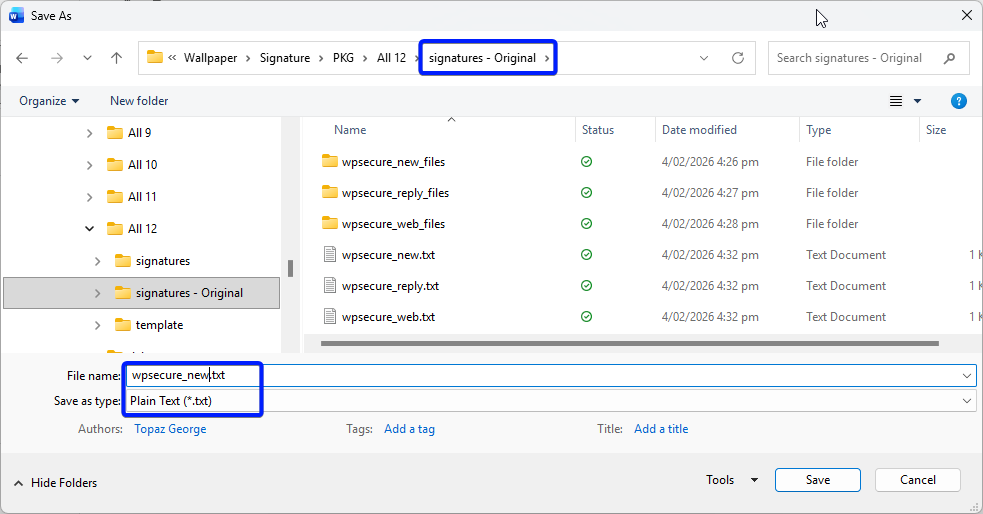
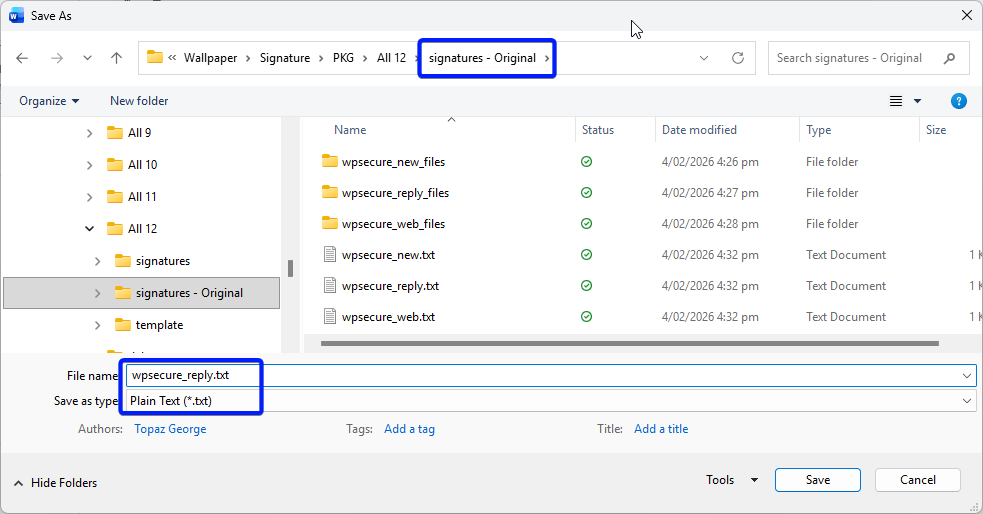
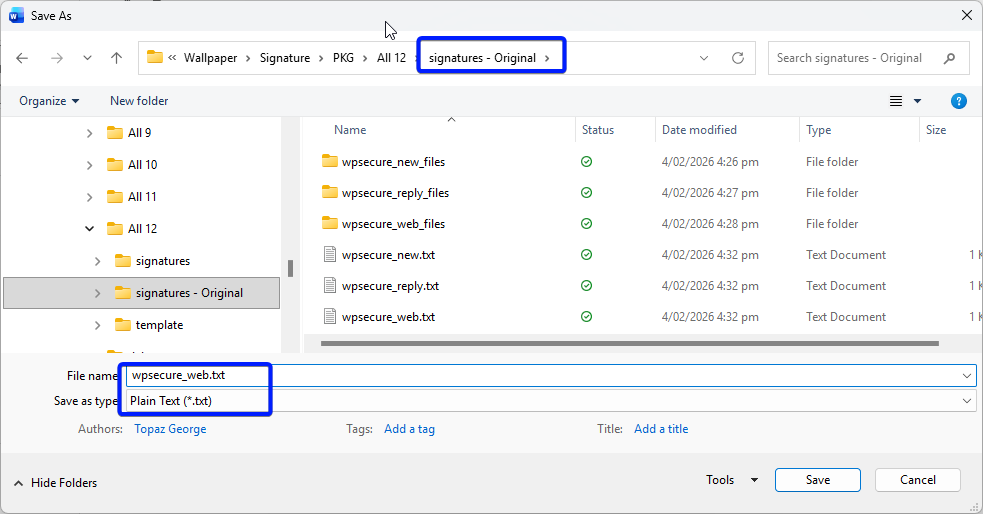
Now you can open the TXT files and modify their structure. But do not change the easy‑to‑identify-and-replace identifiers.
Replace local references for images and other assets with online references.
Local references are paths that point to images or other assets stored on your computer, such as:
wpsecure_web_files/image001.pngfile:///C:/Users/You/Documents/wpsecure_web_files/image001.png
Online references are URLs that point to images or assets hosted on the internet, such as:
https://yourcompany.com/signatures/image001.png
Create a folder structure
Next, create a new folder named Signature in a different location from where your Word DOCX templates are stored. This folder will hold the final versions of your processed signature files—your completed HTM, RTF, and TXT files, along with any associated image folders.
Copy the contents of the Signatures – Original folder and paste them into the Signature folder.
Make sure to write down the full path to this folder, as you will need it during the assembly and automation steps later in the process.
Automation script
The PowerShell script below reads the automation.txt file and replaces the easy‑to‑identify‑and‑replace identifiers with their corresponding placeholder values. When prompted, provide the location of the automation.txt file and the path to the Signatures folder.
If anything goes wrong during the process, you can always restore the files by copying the contents of the Signatures – Original folder back into the Signatures folder.
param(
    [Parameter(Mandatory=$false)]
    [string]$ReferenceFilePath,

    [Parameter(Mandatory=$false)]
    [string]$TargetFolderPath
)

function Remove-SurroundingQuotes {
    param([string]$Text)
    if ([string]::IsNullOrWhiteSpace($Text)) { return $Text }

    $t = $Text.Trim() `
        -replace '^[\u201C\u201D]', '"' `
        -replace '[\u201C\u201D]$', '"' `
        -replace '^[\u2018\u2019]', "'" `
        -replace '[\u2018\u2019]$', "'"

    if (($t.StartsWith('"') -and $t.EndsWith('"')) -or
        ($t.StartsWith("'") -and $t.EndsWith("'"))) {
        $t = $t.Substring(1, $t.Length - 2)
    }
    return $t.Trim()
}

function Normalize-Input { param([string]$Text) Remove-SurroundingQuotes $Text }

if (-not $ReferenceFilePath) {
    $ReferenceFilePath = Read-Host 'Enter reference file path (quotes OK)'
}
if (-not $TargetFolderPath) {
    $TargetFolderPath = Read-Host 'Enter target folder path (quotes OK)'
}

$ReferenceFilePath = Normalize-Input $ReferenceFilePath
$TargetFolderPath  = Normalize-Input $TargetFolderPath

if (-not (Test-Path $ReferenceFilePath)) { throw "Reference file not found: $ReferenceFilePath" }
if (-not (Test-Path $TargetFolderPath))  { throw "Target folder not found: $TargetFolderPath" }

# ------------------ Parse mapping file ------------------

$rawLines = Get-Content -LiteralPath $ReferenceFilePath
$mapping  = New-Object System.Collections.Generic.List[object]

foreach ($line in $rawLines) {
    $line = $line.Trim()
    if (-not $line) { continue }

    $parts = $null
    if ($line -like '*---*') {
        $parts = $line -split '\s*---\s*', 2
    } else {
        $m = [regex]::Match($line, '^(.*\S)\s+(\S.*)$')
        if ($m.Success) { $parts = @($m.Groups[1].Value, $m.Groups[2].Value) }
    }

    if ($parts.Count -eq 2) {
        $replacement = (Remove-SurroundingQuotes $parts[0]).Trim()
        $search      = (Remove-SurroundingQuotes $parts[1]).Trim()

        if ($replacement -and $search) {
            $mapping.Add([pscustomobject]@{
                Search  = $search
                Replace = $replacement
            })
        }
    }
}

if ($mapping.Count -eq 0) {
    Write-Warning "No valid mappings found. Nothing to do."
    exit
}

# ------------------ Process only defined files ------------------

$targetNames = @(
    'wpsecure_new.htm','wpsecure_new.rtf','wpsecure_new.txt',
    'wpsecure_reply.htm','wpsecure_reply.rtf','wpsecure_reply.txt',
    'wpsecure_web.htm','wpsecure_web.txt'
)

$summary = New-Object System.Collections.Generic.List[object]

foreach ($name in $targetNames) {
    $path = Join-Path $TargetFolderPath $name

    if (-not (Test-Path $path)) {
        $summary.Add([pscustomobject]@{ File=$name; Status='Not found'; Mappings=0 })
        continue
    }

    try {
        $text = Get-Content -LiteralPath $path -Raw -ErrorAction Stop
    } catch {
        Write-Warning ("Failed to read {0}: {1}" -f $name, $_.Exception.Message)
        $summary.Add([pscustomobject]@{ File=$name; Status='Read error'; Mappings=0 })
        continue
    }

    if ($null -eq $text) { $text = '' }

    $isRtf = $name.ToLower().EndsWith('.rtf')
    $count = 0

    foreach ($pair in $mapping) {
        $search = $pair.Search
        $replacement = $pair.Replace

        if ($isRtf) {
            $replacement = $replacement.Replace('{','\{').Replace('}','\}')
        }

        if ($text.Contains($search)) {
            $text = $text.Replace($search, $replacement)
            $count++
        }
    }

    if ($count -gt 0) {
        try {
            Set-Content -LiteralPath $path -Value $text -NoNewline -Encoding UTF8
            $summary.Add([pscustomobject]@{ File=$name; Status='Updated'; Mappings=$count })
        } catch {
            Write-Warning ("Failed to write {0}: {1}" -f $name, $_.Exception.Message)
            $summary.Add([pscustomobject]@{ File=$name; Status='Write error'; Mappings=$count })
        }
    } else {
        $summary.Add([pscustomobject]@{ File=$name; Status='No changes'; Mappings=0 })
    }
}

$summary | Sort-Object File | Format-Table -AutoSize
Final checks
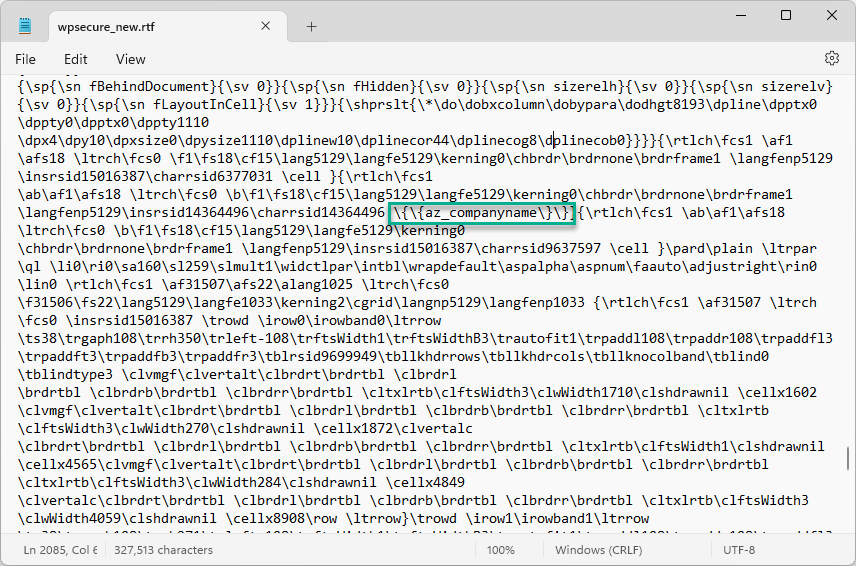
Usually, the HTML and TXT file replacements complete without any issues, but the RTF file may become problematic if edits were not applied correctly. After the script runs, the RTF file may fail to open normally, instead displaying its underlying formatting tags. Do not panic—this is expected behavior.
Make sure that all placeholder values remain fully intact in the RTF file exactly as shown in the image below. They must not be split across multiple lines; if they are broken, the replacement process has failed.