Interactive retrieval of user attributes for Outlook signature placeholders and administrator‑defined custom attributes.
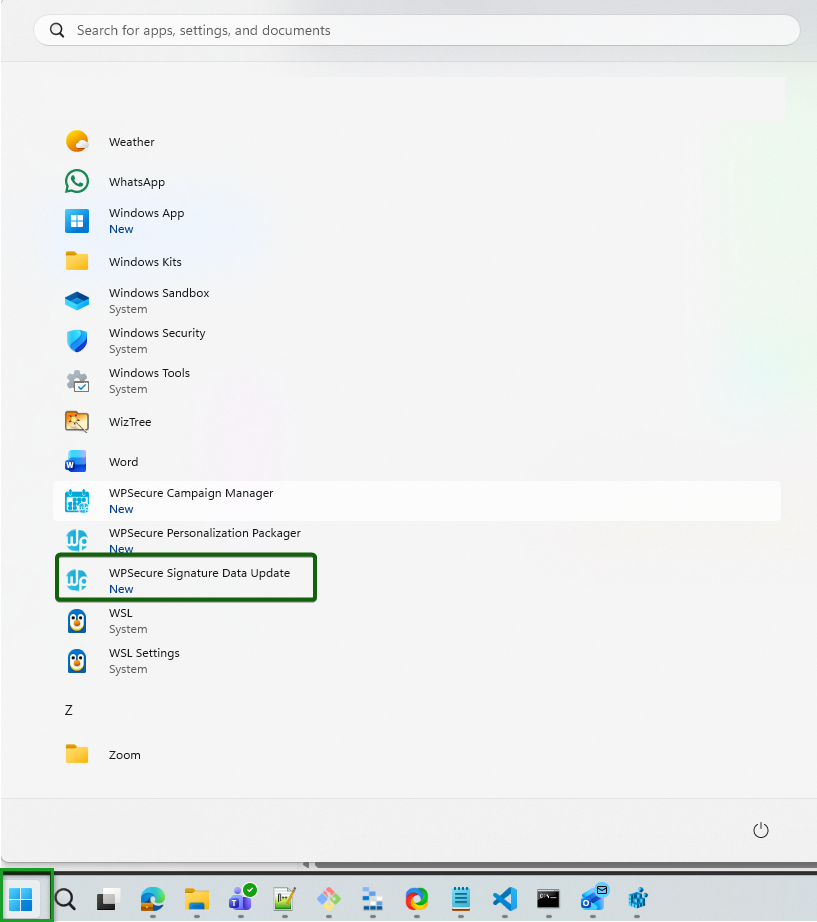
Two types of Start Menu shortcuts
First lets check your Azure tenant type?
Public – The default Azure cloud used globally by commercial organizations and individuals.
China – A separate Azure instance operated by 21Vianet for compliance with Chinese regulations.
USGovernment / USGov – A sovereign Azure cloud designed for U.S. government agencies and contractors, offering enhanced compliance and security.
Suppose you are on a sovereign tenant like Azure China or Azure US Government. In that case, you will need to run one of the following commands before users can successfully connect to Azure using the shortcut to SYNC placeholder attributes.
"C:\Program Files (x86)\wpsecure\wpsecure-set.exe" -azauth china
"c:\Program Files (x86)\wpsecure\wpsecure-set.exe" -azauth usgovernment
If you want to move back to the Public tenant, you can reset the above set value by using the command below.
"c:\Program Files (x86)\wpsecure\wpsecure-set.exe" -azauth public
Setting up App Registration in EntraID
Open Entra ID console (a.k.a. Azure Portal) https://portal.azure.com/ and click on new “New Registration“

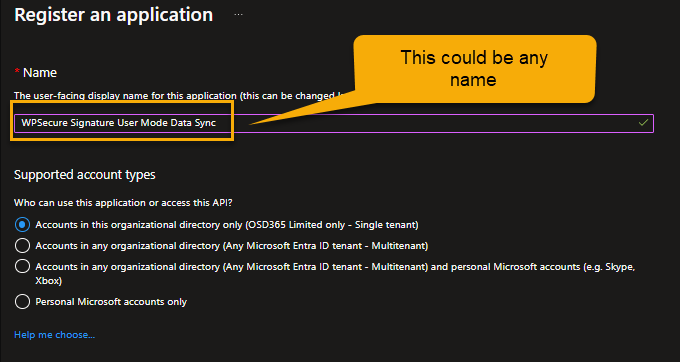
Provide a name for the application. Make sure the name reflects the nature of the registration (User-driven).
Open the newly created App registration and click “Manage/Authentication“, and then in “Manage/API Permissions“.

Make sure you provide admin consent.
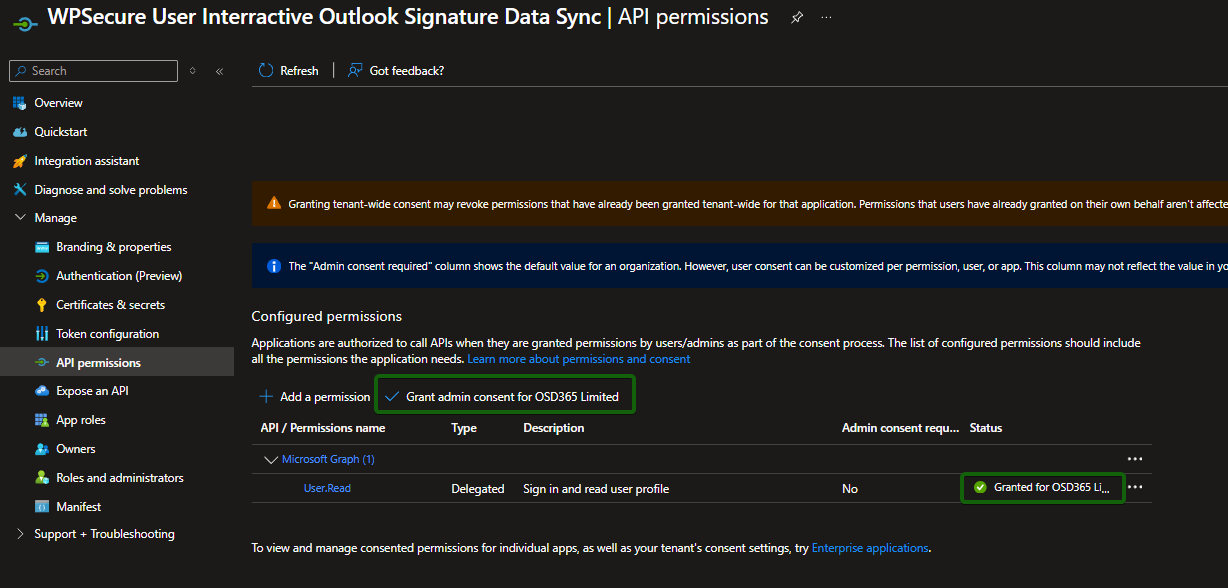
Copy the ClientID and the Tenant ID to Notepad.

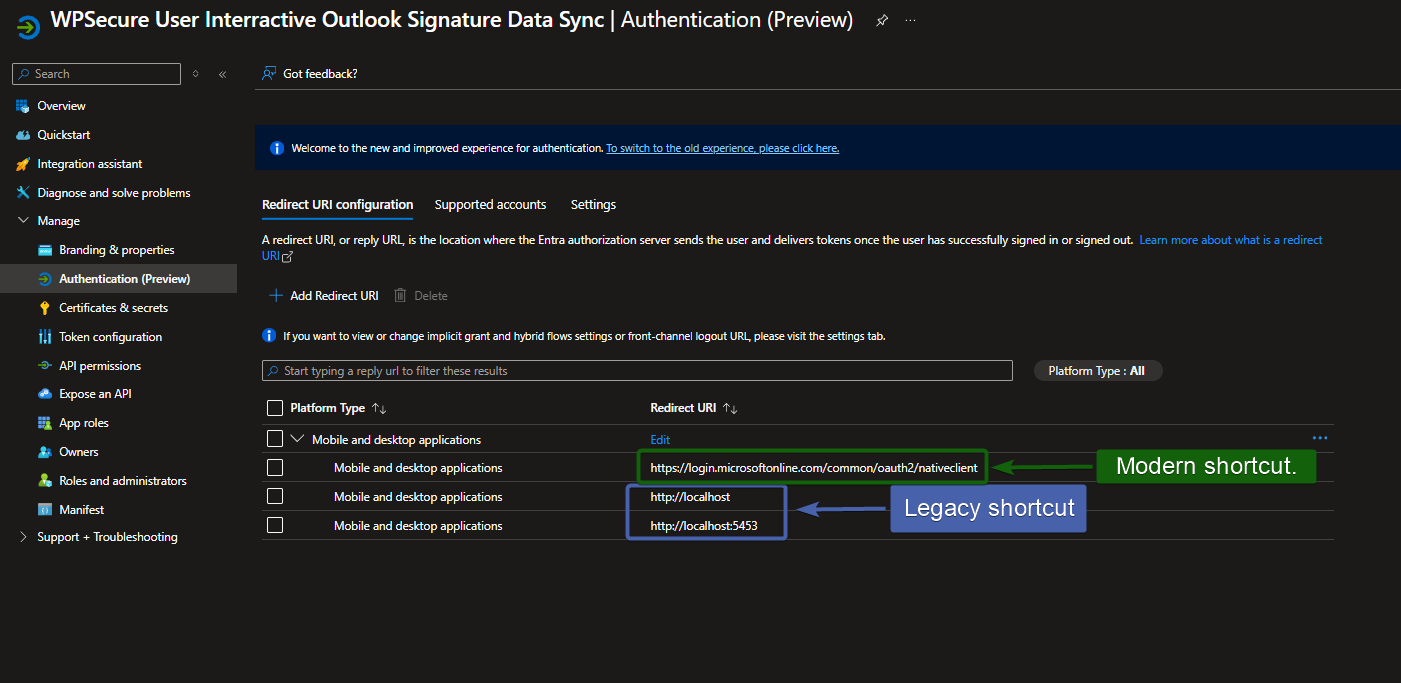
Deploying modern shortcut
Deploy the shortcut using the command below. Run the command as admin or SYSTEM when deploying via Intune/SCCM. Use the Tenant ID and Client ID values from Notepad.
"c:\Program Files (x86)\wpsecure\wpsecure-set.exe" -tenantid 9faddg5d6-1111-2222-a49a-001d78592732f -clientid 55eba948-6cdd-4b98-ad9b-7ff7b36138c6 -createsc -version 2.3.57
The executable ‘wpsecure-set.exe‘ is in the WPSecure application directory within ProgramFiles (x86).
If the shortcut is deployed via Intune or SCCM, use the registry below to detect its presence or absence.
Run the command below as an administrator to remove the shortcut above.
"c:\Program Files (x86)\wpsecure\wpsecure-set.exe" -dcsdi
You can also deploy a CSV file that allows end users to set custom placeholder attributes. Custom placeholder attributes start with “custom_user_set_“. For example “custom_user_set_givenname” or “custom_user_set_jobtitle“, or “custom_user_set_yourthoughtfortheday“
When you create a deployment package in MECM or in Intune, add the below CSV file to the root of your payload. The CSV file deployment is optional. Include a CSV file only if you want users to set custom attributes.
When the installation command runs, WPSecure automatically looks for a file named csdi.csv in the same directory as the installation payload. If the file is found, it gets copied to the ProgramData folder.
csdi.csv
The install command line will be as discussed above.
"c:\Program Files (x86)\wpsecure\wpsecure-set.exe" -tenantid 9faddg5d6-1111-2222-a49a-001d78592732f -clientid 55eba948-6cdd-4b98-ad9b-7ff7b36138c6 -createsc -version 2.3.57
The content of the CSV file will look similar to the CSV below.
					custom_user_set_givenname,Given name
custom_user_set_surname,Last name
custom_user_set_jobtitle,Job title
custom_user_set_streetaddress,Street address
custom_user_set_mobilephone,Mobile phone
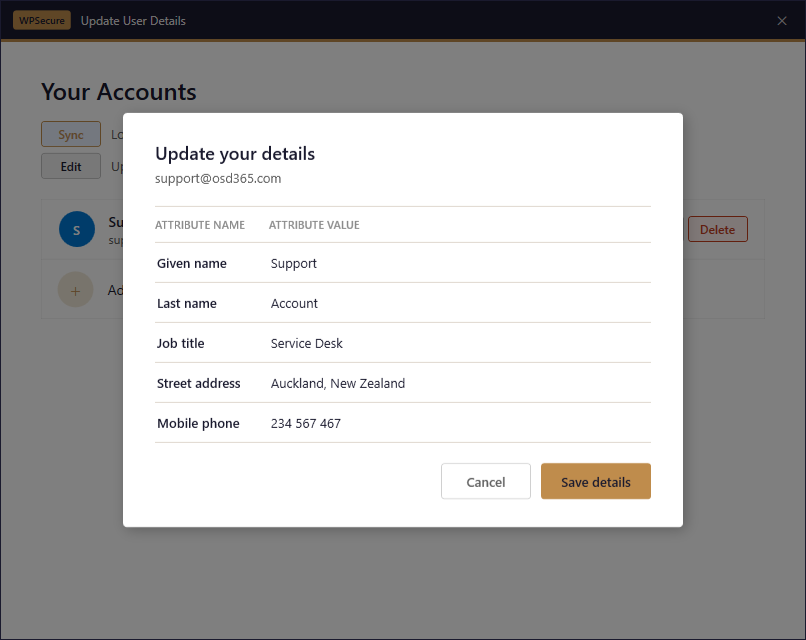
CSV column 1 will be your attribute name, and the CSV column 2 will be the display label. The label the end user sees in the Edit panel inside the WPSecure Data Update UI. Please see the image below.
When the user clicks on the start menu shortcut, they will see the following window.
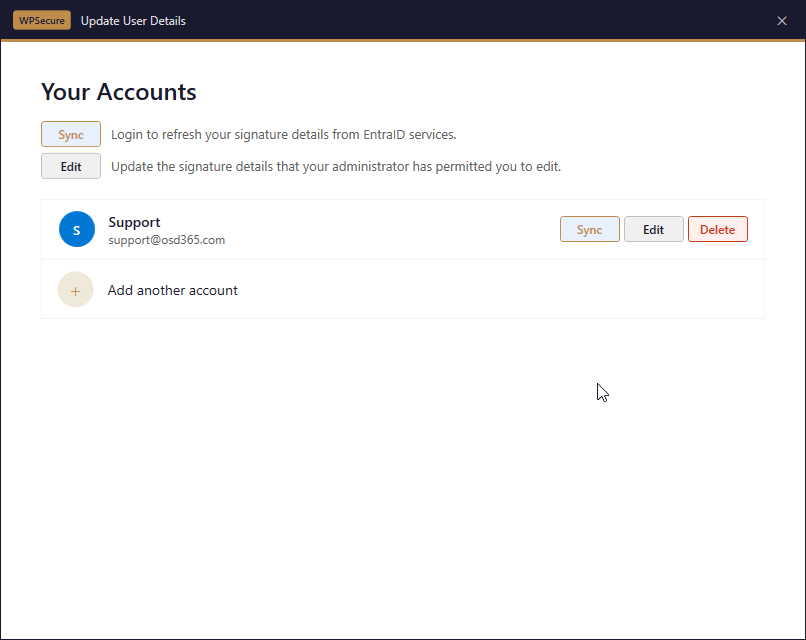
If no accounts are listed, click the “Add another account” button to add an account. Click the “Sync” button to retrieve user attributes (placeholders) for that account.
Depending on your organization’s security settings, the WPSecure engine will automatically sync non-interactively in the background every eight hours. This will be triggered whenever the user locks/unlocks their computer.
If a CSV file was deployed, the user will see an “Edit” button. When clicked, it opens a panel that lets them edit the admin-defined custom placeholder attributes.
Administrators can then use {{custom_user_set_givenname}}, {{custom_user_set_jobtitle}}, or {{custom_user_set_mobilephone}} in the email signature templates.
Deploying legacy shortcut
Deploy the legacy shortcut using the command below. Run the command as admin or SYSTEM when deploying via Intune/SCCM. Use the Tenant ID and Client ID values from Notepad.
"C:\Program Files (x86)\wpsecure\wpsecure-set.exe" -source azure -tenantid 9faddg5d6-1111-2222-a49a-001d78592732f -clientid 55eba948-6cdd-4b98-ad9b-7ff7b36138c6 -createsc -version 1.2.3.5
The executable ‘wpsecure-set.exe‘ is in the WPSecure application directory within ProgramFiles (x86).
If the shortcut is deployed via Intune or SCCM, use the registry below to detect its presence or absence.

Run the command below as an administrator to remove the shortcut above.
"c:\Program Files (x86)\wpsecure\wpsecure-set.exe" -smsssc